

A common situation: you create a new business and attach a small blog to it, without looking ahead and not counting on a serious increase in consumed resources and capacities in the future. And then such a day happened – your current blog on special services, such as Blogger, needs a larger platform. A logical question in such a situation is how to migrate a site to WordPress – a more variable and large-scale option. In this article, we’ll look at how to migrate your blog from Blogger to WordPress.
Website transfer is carried out in five steps.
Step 1. Export content from Blogger
Step 2. Importing data from Blogger to WordPress
Step 3. Setting up permalinks
Step 4. Setting up redirects
Step 5. Import Blogger Images into WordPress Media Library
Step 1. Export content from Blogger
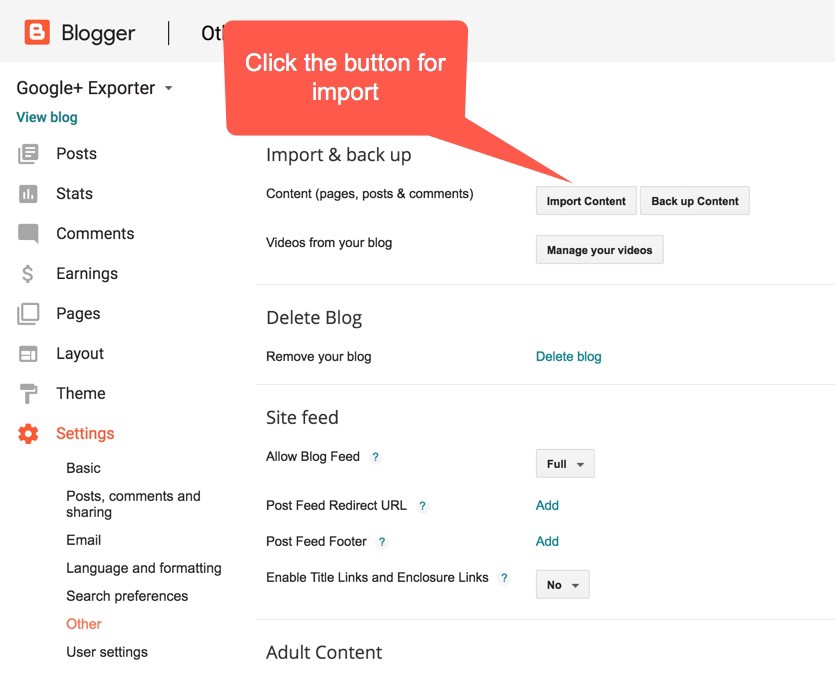
First, you need to back up your current site to Blogger. To do this, on the sidebar, select the Settings menu, after Other and select Back up content.
Step 2. Importing data from Blogger to WordPress
Log into the admin panel on your WordPress site. Then find the Tools tab in the side menu, then Import.
Select Blogger from the import list. After the plugin installation is complete, you need to upload a backup copy of the files – select the active Choose File button. In the pop-up window, find your previously generated archive and select it, and then click Upload file and import.
It will take a while to unpack all the content from the file. After completing the process, select a single author for all publications – you can add a new user or select an author from the drop-down list, which represents all users. Finally, click Submit.
Step 3. Setting up permalinks
The next step is to shape the view for the permalinks. It all depends on your preference – choose the desired type of URL for all publications, as well as for future ones. To do this, go to Settings and select Permalinks.
If you like the style of the Blogger URL formation, then choose the Month and name – if not, then any of the proposed ones or form an arbitrary type of links. Finally, Save changes.
Step 4. Setting up redirects
Now you need to make sure that users who are used to visiting your current resource do not lose you and end up on the pages of the new WordPress site. This will require the following:
Install a special plugin that allows you to redirect. In the sidebar, select Plugins and Add New.
In the side search box, enter the name of the plugin you want – Blogger to WordPress, select it and click Install (Install Now). After installation – Activate.
After completing the installation and activation of the appropriate plug-in, go to the Tools tab and select the previously installed plug-in to go to its settings.
On the plugin settings screen, click Start Configuration, after that you need to generate the HTML code. Just copy everything that will be in the Generated Code field.
Once you’ve copied your HTML, head back to Blogger settings. There, in the sidebar, find Theme, scroll down to the bottom, select Revert to classic themes and click Revert to classic theme.
In the Template settings, find the Edit Theme HTML parameter, select the entire field content, delete it and replace it with the previously copied HTML code from the Blogger to WordPress plugin. Then click Save theme. Then Step 4 will be completed.
Step 5. Import Blogger Images into WordPress Media Library
The last thing you need to do is make sure that all images from the archive have been unpacked and installed correctly. In the overwhelming majority of cases, WordPress will unzip the XML file without errors, but it also happens that the images cannot be loaded. In order to completely eliminate this possibility, you will need to install another plugin – Auto Upload Images. Install it, and then do not forget to Activate (Activate).


COMMENTS